Showing posts with label Holiday. Show all posts

Raw Mango Berry Fruit Tart

     I started writing a big long essay about Passover and making food choices that no longer enslave others, and about freedom from our addictive and unhealthful food choices. But I know you all would be likely to skip over it because this tart is just so darn pretty. Those are extremely important issues to me though, so I will be revisiting this post soon. In the meantime, here you go...
     Let me just say that, believe it or not, this tart really tastes even better than it looks. Plus, it's made entirely of whole, unprocessed ingredients--literally just fruit and nuts. It's raw, gluten-free, oil-free, and has no added sugar. And, of course, it's kosher for Passover.

     Best.  Dessert.  E V E R! 

Ingredients:
2 cups walnuts
1 cup pitted dates
1/4 shredded unsweetened coconut, divided
2 mangos
1/2 cup dried mango, soaked in water for at least 10 minutes
1 ripe banana
Fruit of your choice (I used baby kiwi, blueberries, strawberries, blackberries, and raspberries.)

Instructions:
1. Add the walnuts, dates, and half the coconut to a food processor and pulse till somewhat smooth. It doesn't need to be as pureed as peanut butter, but it shouldn't be too crumbly either.
2. Spread the rest of the coconut onto the bottom of a pie pan. Press the walnut-date mixture evenly into the bottom and sides of the pie pan to form the crust. Cover with plastic wrap and place in the freezer for 15-20 minutes.
3. In the meantime, blend the dried and fresh mango and banana until completely smooth. Pour onto the crust and place back in the freezer for about an hour.
4. Cover with fruit and place in the fridge until ready to serve. (Depending on how long that is, there will be some variation in terms of firmness when slicing. Mine was pretty messy but it really didn't matter because it tasted so good. You can always keep in the freezer longer and then let it de-thaw for 30-60 minutes before serving if you want it firmer.)

eHow Video: North African Lentil Casserole

     This dish has undergone several revisions and I can now confidently say it is officially FANTASTIC. The ingredients are very simple but they come together to make something really elegant. Mr. Goldhouse, with his ever impressive ability to articulate the heart of the matter in as few words as possible (unlike his wife), describes this casserole as "fancy poor man's food." 
     I recently served this to some new friends we had over for dinner and received praise every vegan chef loves to hear from a non-vegan: "I had no idea vegan food could taste so good!" Plus, as regular readers already know, I am a huge fan of dishes that lasts for several meals because it makes life so much easier, and this one really lasts well. I suggest making this on a Saturday or Sunday for dinner and then bringing it for lunch or having it for dinner during the week. Whenever I make it, even though I'll eat it for several dinners in a row, I am still always sad when it's finally gone because it is just so delicious. This one is a MUST for your cooking repertoire! 
(Serves 8-10)
Ingredients:
1 large onion, diced
2 medium carrots, diced
6 cloves of garlic, minced
2 tablespoons sweet paprika
1 tablespoon cumin
1 teaspoon allspice
1 teaspoon crushed red pepper
1 teaspoon turmeric
1 small can of no-salt added tomato paste
2 cups dry green lentils
1 cup dry quinoa
6 cups of low-sodium vegetable broth or water
2 teaspoons cinnamon
2 cups mashed sweet potatoes (canned is fine)
1-2 lbs of frozen spinach
1 large lemon
1/2 cup chopped cilantro

Instructions:
1. In a large saucepan, saute the onions and carrots with 1-2 tablespoons of water over medium heat until the onions become translucent, approximately 10 minutes. 
2. Add the garlic and saute for another 2 minutes.
3. Add the paprika, cumin, allspice, crushed red pepper, turmeric, and tomato paste. Stir until throughly combined.
4. Add the lentils, quinoa, and broth or water. Bring to a boil over high heat, and then lower the heat to medium and cover for 45 minutes.
5. Meanwhile, to prepare the top layer, mix the cinnamon with the sweet potatoes. Preheat the oven to 400 degrees.
6. Once the lentils are fully tender, add the frozen spinach to the saucepan and cook until the spinach is fully heated.
7. Zest and juice the lemon and add to the saucepan. 
8. Pour the mixture into a 9x13-inch baking dish. Spread the sweet potatoes evenly over the mixture and bake for 30 minutes. Garnish with cilantro when ready.

eHow Video: "Cooking Vegetable Lasagna"

     Just like my butternut squash lasagna, this recipe has thinly sliced vegetables functioning as lasagna noodles. This dish uses eggplant, which has always been one of my most favorite vegetables. And it also has kale and mushrooms, two of my other favorites! If you are new to a plant-based diet or will be dining with those who are, mushrooms are great because they provide the chewy smokiness that many people say they crave about meat. 
     I am also very excited to share the recipes for béchemel sauce and parmesan cheese. Both are absolutely fantastic! The recipe for the parmesan is incredibly quick and easy. It's sort of ridiculous how easy it is-- it literally takes 5 seconds to prepare. The béchemel takes a bit more time but it can easily be made ahead of time and frozen. I have a feeling you'll want to use both of these recipes in other dishes as well, so be sure to bookmark them.
     Enjoy!

Lasagna Ingredients:
1 batch of your favorite marinara sauce (store-bought is fine)
2 medium eggplants, sliced length-wise
1 bunch kale leaves (or spinach)
4 cups sliced mushrooms
1 large onion, sliced

Béchemel Ingredients:
3 cups nondairy milk
1/2 cup raw cashews, soaked in warm water for at least 20 minutes
3 heaping tablespoons arrowroot flour or cornstarch
2 tablespoons lemon juice
1/4 cup nutritional yeast
1 teaspoon salt

Parmesan Cheese Ingredients:
1/2 cup raw walnuts
1/4 cup nutritional yeast
1/2 teaspoon salt

Instructions:
1. To make the béchemel sauce: Blend all the ingredients together. Add the mixture to a medium saucepan over high heat and whisk for 5-10 minutes until thickened.
2. To make the parmesan cheese: Add the ingredients to a blender and pulse until the walnuts are just ground. Be careful not to over blend into a paste.
3. Saute the onions and mushrooms for 5-7 minutes. Set aside.
4. In a large glass baking dished lined with parchment paper, layer in the following order: marinara sauce, eggplant, béchemel sauce, kale, mushrooms. Repeat until you run out.
5. Sprinkle half of the parmesan cheese on top. Bake for 1 hour covered with foil and 1 hour without foil. (I like my eggplant really soft, so feel free to lessen the time if you prefer your eggplant more chewy.)
6. Sprinkle with the remaining parmesan cheese and serve.

eHow Video: "Southern-Style Mustard Greens"

     Mustard greens are so incredibly healthful, it was hard to decide which of their many benefits I ought to focus on in this post. Here are just three reasons why you'll want to incorporate more of these luscious leafies into your diet:

Cardiovascular Benefits
    Mustard greens support the cardiovascular system in three significant ways. First, they are anti-inflammatory. Inflammation narrows the arteries and increases the risk that they'll become blocked, so these anti-inflammatory properties are obviously a huge benefit. Second, by binding with bile acids in the intestines, mustard greens help lower cholesterol levels. And third, because mustard greens are exceptionally high in the B-vitamin folate, they help prevent homocystein build-up. Homocystein is an amino acid found in the blood that is acquired mostly from eating animal products. High levels are related to the development of heart and blood vessel disease.

Cancer Prevention
     Mustard greens are also powerful cancer-fighters because they are LOADED with a broad spectrum of antioxidants. Chronic oxidative stress is a major risk factor for the development of most cancer types and antioxidants lower our risk of oxidative stress on our cells (hence the name: anti- oxidants). For the record, plants have on average 64 times more antioxidant power than animal products. The few antioxidants that do happen to be found in animal products are only there because those animals were fed plants.

Bone Health
     And lastly (though I truly could go on endlessly), mustard greens are an excellent source of calcium. While dairy products have long been touted as "good for your bones," the countries with the highest consumption of dairy also have the highest rates of osteoporosis. This is because dairy, like all animal products, is highly acidic. The body needs to keep a very specific acid-alkaline balance in order to function, so whenever animal products are consumed, the body must find an alkaline source so it leaches the calcium from our bones (which is high in alkaline). So, in fact, consuming dairy products are quite harmful to our bones. Mustard greens, on the other hand, along with other greens like kale, collards, bok choy, broccoli, and okra, are not acidic and thus only contribute to the strength of our bones.

     So while you enjoy this quick and tasty recipe, you can also feel good knowing that you are eating one of the most healthful foods on the planet!

Ingredients:
1 large bunch mustard greens, chopped
1 small onion, chopped
3-6 cloves garlic (depending on your garlic preferences), chopped
1 teaspoon smoked paprika
1 teaspoon salt (optional)
1 teaspoon black pepper
1/4 cup water

Instructions:
1. In a cast iron pot, saute the onion until soft.
2. Add the garlic, smoked paprika, salt and pepper. Cook for 1 more minute, stirring constantly.
3. Add the mustard greens, and stir until they are coated with the spices and just wilted.
4. Add 1/4 cup of water and let simmer, covered, for about 5 minutes. Remove cover and cook for another 1-2 minutes.

Resources:
http://www.whfoods.com/genpage.php?tname=foodspice&dbid=93
http://www.vrg.org/nutrition/calcium.php
http://www.pcrm.org/health/health-topics/calcium-and-strong-bones

eHow Video: "Butternut Squash Lasagna with Ricotta" (vegan, of course!)

      Need a dish that is guaranteed to impress? This is definitely the one.
      I love this recipe because it includes everything we love about lasagna--the warmth, the comfort, and the heartiness. But, unlike traditional lasagna, my version is incredibly healthful. Not only does it leave out all animal products, it's also made entirely of whole foods! Rather than using pasta noodles made with processed white flour, I instead use very thin slices of butternut squash. This makes the lasagna more healthful, more flavorful, and more colorful!
     This recipe can be a bit time-consuming, but it doesn't have to be. My tip: Make the sausage and the ricotta ahead of time (they can easily be frozen and de-thawed when needed), then all you'll have to do on the day-of is assemble and bake. If you aren't able to make the sausage and ricotta ahead of time, it's really not that big of a deal, and the extra time it takes is still absolutely worth it because this dish is so spectacular. I would just recommend making doubling the sausage and ricotta to freeze and use for next time. This dish is too good to only make once, and the easier it is to prepare, the more likely you are to make it again and again.
     Plus, as those of you who follow Goldhouse Gourmet on Facbeook know, I am a HUGE fan of dishes that can last for several meals. They mean you don't have to cook every night and/or can have healthful leftovers to bring with you for lunch. This lasagna definitely fits that bill, and is one of those dishes that only gets better day after day. That is, if you manage to have any left :)


Ingredients:
1 butternut squash
1 jar marinara sauce (I like Eden Organic's No Salt Added Spagetti Sauce)

Sausage Ingredients:
1 chopped carrot
1 chopped onion
2 cups cooked quinoa
4 cups cooked lentils
2 tablespoons marjoram
1/2 teaspoon red pepper flakes
1 teaspoon paprika
2 teaspoons fennel
2 tablespoons ground flax
2 tablespoons thyme
4 cloves garlic

Ricotta Ingredients:
2 cups raw cashews, soaked in warm water for at least 20 minutes
1/3 cup nondairy milk (I like soy or almond milk)
3 tablespoons lemon juice
3 garlic cloves
1 tablespoon maple syrup
1 tablespoon Italian herb blend
1/3 cup fresh basil
1/4 teaspoon salt
1 teaspoon black pepper

Instructions:
1. To make the sausage: Saute the carrot and onion for 10-15 minutes. Once browned, place vegetables into a food processor along with all the spices and flax. Add cooked quinoa and lentils and pulse just till ingredients begin to stick together (about 10-15 times). Place mixture in a pan and brown.
2. To make the ricotta: Place cashews, nondairy milk, lemon juice, garlic, and maple syrup in a food processor and blend till just smooth (remember, ricotta is somewhat grainy rather than completely whipped). Add in the basil, Italian herb blend, salt and pepper and pulse until blended in.
3. Preheat the oven to 400 degrees.
4. Spread a thin layer of marinara onto the bottom of a glass dish.
5. Layer the squash on top. Avoid overlapping pieces as much as possible.
6. Place a layer of ricotta on top.
7. Spread a layer of sausage crumbles on top.
8. Add another layer of squash and then another layer of marinara sauce.
9. Start again at step 6 and repeat until near the top of the dish. Top with any remaining ricotta.
10. Cover with tin foil and bake for 40 minutes or until a knife can be easily inserted all the way through.

eHow Video: "Pumpkin Praline Cheesecake Recipe"

     Every year at Thanksgiving I used to face a dilemma: should I make a pecan pie or should I make a pumpkin pie? While we each enjoy both kinds of pie, my husband was somewhat partial to pumpkin pie while I was somewhat partial to pecan pie. So one year I decided I would make both, but do it in one pie. 
     Some said it simply couldn't be done. Some said I would be ruining two perfectly good desserts by combining them. And that was before I decided to make this pecan-pumpkin pie combo a cheesecake as well.
     Well, good thing I didn't listen, because this pie is layer upon layer of heaven. Talk about a few of everyone's favorite things... Crunchy pecan praline. Spiced pumpkin puree. Creamy, decadent cheesecake. And a raw and gluten-free crust, to boot. 
     Trust me, with this pie there will be endless reasons to give thanks :) 

Crust Ingredients:
2 cups walnuts
1 cup pitted dates
1/4 cup shredded coconut

Cheesecake Ingredients:
3 cups raw cashews, soaked overnight
1/3 cup lemon juice
1/2 cup agave
1 teaspoon vanilla extract
3/4 cup coconut oil, melted (for a lower fat version, you could try substituting water, though I haven't tried that yet)

Pumpkin Layer Ingredients:
1 cup canned pumpkin puree (NOT pumpkin pie puree)
2 tablespoons arrowroot starch (or cornstarch)
1/2 cup nondairy milk
1/3 cup sugar
1 teaspoon vanilla extract
1/4 teaspoon ground ginger
1/4 teaspoon ground cinnamon
pinch of nutmeg
pinch of allspice

Praline Ingredients:
2 tablespoons coconut oil
1/3 cup chopped pecans
1/4 cup raw pumpkin seeds
2 tablespoons brown sugar
dash of cinnamon
pinch of salt
2 tablespoons maple syrup

eHow Video: "Acorn Squash Stuffed with Sausage and Ricotta Cheese" (vegan, of course!)

     One of the things people worry about when contemplating going vegan is what the holidays will be like, particularly Thanksgiving. I recently received an email from a non-vegan friend who said that she had just learned about what happens to turkeys in slaughterhouses "and now Thanksgiving is ruined!"
     Au contraire! The best Thanksgiving I ever had was my first vegan Thanksgiving. I felt that I was actually honoring the true spirit of the holiday, which is about giving thanks and celebrating life. Plus, putting aside the ethics and the health, it was the most delicious Thanksgiving I had ever had. After all, aren't the real stars of the Thanksgiving meal the sides and the desserts?
     One option for a vegan Thanksgiving is to have the meal be made up entirely of delicious side dishes. Personally, I think that would be absolutely fantastic, but I also know many of us are used to and enjoy having a main dish as a central focal point. Hence, this gorgeous stuffed acorn squash recipe!
     The sausage and ricotta can be prepared well in advance and then frozen. Then, on the big day, all you'll have to do is assemble them into the squash halves and stick them in the oven as described. The combination of flavors and textures in this dish are so aromatic and comforting--the hearty, earthiness of the sausage; the lemony freshness of the ricotta; and the soft, candy-like sweetness of the squash. To my mind, the best way to truly honor this holiday is with food that celebrates life, peace, and joy :)

Ingredients:
6 acorn squashes (recipe yields enough to fill at least 12 squash halves; any remaining can be frozen)

Sausage Ingredients:
1 carrot, chopped
1 onion, chopped
2 cups cooked quinoa
4 cups cooked lentils
2 tablespoons marjoram
1/2 teaspoon red pepper flakes
1 teaspoon paprika
2 teaspoons fennel
2 tablespoons ground flaxseeds
2 tablespoons thyme
4 cloves garlic

Ricotta Ingredients:
2 cups raw cashews, soaked in warm water for at least 20 minutes
1/3 cup nondairy milk (i.e. almond, soy, etc.)
3 tablespoons lemon juice
1 tablespoon Italian herb blend
3 garlic cloves
1 tablespoon maple syrup
1/3 cup fresh basil
1/4 teaspoon salt

Instructions:
1. Slice the acorn squashes in half and scoop out the seeds. Place in the oven for 30 minutes at 400 degrees.
2. To make the sausage: Saute the carrot and onion for 10-15 minutes. Once browned, place vegetables into a food processor along with all the spices and flax. Add cooked quinoa and lentils and pulse just till ingredients begin to stick together (about 10-15 times). Place mixture in a pan and brown.
3. To make the ricotta: Place cashews, nondairy milk, lemon juice, garlic, and maple syrup in a food processor and blend till just smooth (remember, ricotta is somewhat grainy rather than completely whipped). Add in the basil, Italian herb blend, salt and pepper and pulse until blended in.
4. To compose the dish, place a layer of ricotta at the bottom of each squash bowl. Then add some sausage crumbles. Top with more ricotta. Any remaining sausage and ricotta can be frozen and used at another time (perhaps for butternut squash lasagna).
5. Put squashes back in the oven and bake for another 30 minutes, or until they are soft and caramelized. 

eHow Video: "How to Make Southern Candied Yams"

     Ladies and gentlemen, I present to you what may be the greatest side dish of all time!
     The first time I made this dish I ended up completely ignoring the main course and instead consumed all the yams.
     By myself.
     It was glorious.
     I will most definitely be making this dish for Thanksgiving this year and then again when we go down South to visit my in-laws over Christmas.
     Also, just to be totally honest here, when I say "yams" I actually mean "sweet potatoes." Don't be mad though, because when you say "yams" what you probably mean is "sweet potatoes" too. What we commonly refer to as a "yam" in the U.S. is actually a "sweet potato." Even in grocery stores, what are labeled "yams" are usually "sweet potatoes." The USDA has tried to crack down on this crazy scandal by requiring that sweet potatoes labeled "yams" include "sweet potatoes" in the label as well. That's why you'll often see "sweet potato yams." Both yams and sweet potatoes are nutritionally similar but sweet potatoes have a nutritional edge because they have much higher levels of vitamin A, vitamin B6, and vitamin C.
     While I usually don't cook with oil because it is a processed food without any fiber, sweet potatoes (aforementioned "yams") are one of those foods that benefits from being eaten with a small amount of fat. (Keyword here is "small," folks! I'm talking 1-2 tablespoons for an entire recipe.) The fat allows us to better absorb the beta carotene, an antioxidant that is critical for eye health, bone health, and reproductive health.
     Sweet potatoes really are a nutritional superstar, and they taste like a dessert. If that's not a win-win, then I don't know what is!

   
Ingredients:
2 1/2 lbs garnet yams or sweet potatoes, peeled and cut into 1/2-inch rounds
2 tablespoons toasted sesame oil
1 (2-inch) cinnamon stick
2 tablespoons molasses
1 teaspoon tamari (I prefer reduced-sodium)
2 tablespoons pure maple syrup
1 tablespoon white miso paste
2 tablespoons lemon juice
6 tablespoons water

Instructions:
1. Preheat the oven to 425 degrees.
2. In a large bowl, toss the sweet potatoes with 1 tablespoon of the sesame oil.
3. Spread the sweet potatoes onto a parchment-lined baking sheet in a single layer and roast for 25 minutes. Flip, and roast for another 25 minutes.
4. Place the cinnamon stick at the bottom of a 2-quart baking dish, and add the sweet potatoes in layers. Set aside.
5. In a medium-size bowl, whisk together the remaining six ingredients plus the remaining tablespoon of sesame oil and pour over the sweet potatoes.
6. Bake, uncovered, for 30 minutes.

eHow Video: "Healthy Recipe for Carrot Cake With Cream Cheese Topping"

     I love words. I really do. But sometimes, when something is just so good, words are not enough. They just aren't. I could try and talk about how this cake is surprisingly low in added sugar, and that most of its sweetness comes from whole fruit. Or I could talk about how it's very high in fiber, beta-carotene, potassium, B vitamins and omega-3's, while also being completely free of cholesterol (and any other harmful animal products, as always). But I think you'll get a better sense of how unbelievably outstanding this carrot cake is if I tell you that everyone who tries it for the first time eats the first few bites silently with their eyes closed.
     Yes. It is *that* good. 

Cake Ingredients:
2 cups oat flour
2 1/2 cups carrots, shredded
3 teaspoons baking soda
1/4 cup brown sugar
1 cup applesauce, unsweetened
1 cup pineapple, blended
1 banana, mashed
1 teaspoon cinnamon
1 dash cayenne
1 teaspoon vanilla extract
1 cup raw walnuts, chopped
1/2 cup shredded coconut
1 cup raisins

Frosting Ingredients:
1 cup raw cashews, soaked in warm water for at least 2 hours
1/2 cup water
1/4 cup agave
1 teaspoon vanilla
3 tablespoons lemon juice

Instructions:
1. Preheat the oven to 350 degrees.
2. In a small bowl, mix oat flour and baking soda.
3. In a larger bowl, beat the sugar, pineapple, banana, and applesauce together. Add cinnamon, cayenne, and vanilla and mix thoroughly.
4. Add the flour mixture along with the chopped walnuts and shredded coconut to the larger bowl and mix. Add the shredded carrots and raisins till fully combined.
5. Spread the batter in a nonstick pan. Bake for about 50 minutes or until a toothpick inserted into the center comes out clean.
6. While the cake is baking, add all the frosting ingredients to a blender. Process until completely smooth. Using a spatula, scoop the frosting into a small bowl and place in the fridge to chill.
7. Once the cake has fully cooled, spread the frosting on top. Best served chilled.

My eHow Video Series: Southern Sweet Potato Pie Recipe

     The final recipe in this video series is, quite appropriately, a dessert. I made the pumpkin version of this recipe last Thanksgiving and it was such a hit that I decided to make it for my in-laws down South during our visit over Christmas. My husband's grandfather was a chef in the army during the Korean war and has been baking ever since, so my in-laws are used to only the tastiest of desserts. Plus, he has a particular expertise in pies, so my choosing to bake this for everyone shows just how confident I am in this outstanding recipe.
     Everyone who tried it absolutely loved it. Because the pie has no dairy, no butter, no eggs--which we are so used to thinking of as necessary ingredients for delicious baked goods--and it's gluten-free to boot, I think they were surprised to find it so incredibly delicious.
     But as I've said before, one of the most significant things I have learned since going vegan is that we don't have to choose between honoring our taste buds, promoting our health, or living by our values. I hope that from watching this series, you also see that we CAN eat in a way that upholds and celebrates all these things simultaneously. And if we can, why wouldn't we?
     Thanks so much for watching. You can also see the full series on eHow HERE. If you have any questions, don't hesitate to reach out. That's why I'm here.
     Please share these videos with others!!
Ingredients:
Crust:
1 cup oat flour
2 cups raw pecans, processed in a food processor for 30 seconds till oils release
3 tbsp ground flax
1 tsp ground cinnamon
1/2 tsp kosher salt
1/4 cup brown rice syrup
2 tbsp canola oil
Filling:
2 1/4 cups canned sweet potato
1/2 cup brown sugar
1/4 cup almond milk
1/4 cup pure maple syrup
3 tbsp arrowroot starch (or cornstarch)
2 tsp vanilla extract
2 tsp cinnamon
1/2 tsp ground ginger
1/2 tsp nutmeg
1/2 tsp ground cloves

Instructions:
1. Preheat the oven to 350 degrees. Lightly oil a 9-inch pie pan.
2. Melt canola oil with brown rice syrup for about 30 seconds in a microwave. Pour into a large bowl with pecans.
3. Add the rest of the crust ingredients and mix together. Using your hands, squeeze the dough over and over to combine very well. If too dry, add more canola oil.
4. Press pecan dough firmly into pie dish to form a crust.
5. Pre-bake at 350 degrees for 10 minutes. Remove and cool for 10 minutes.
6. In a large bowl, whisk together the maple syrup and cornstarch.
7. Add remaining ingredients and whisk together, adjusting spices to taste.
8. Pour the filing onto crust. Cover with tin foil and bake for 50-55 minutes at 350 degrees. Place on a cooling rack for 1 hour.
9. Transfer to fridge to set for a minimum of 3 hours or overnight (this is a must!). Do not slice until it's been in the fridge for at least 3 hours. Slice with a very sharp knife and enjoy every bite!

My eHow Video Series: Roasted Cauliflower With Mustard Butter

     Because cauliflower is white, people often assume it's a nutritional dud, on par with iceberg lettuce. But cauliflower is part of the cruciferous, or cabbage, family of vegetables. Other cruciferous vegetables include kale, bok choy, broccoli, and Brussels sprouts, which are more well-known as nutritional superstars. Cauliflower provides special nutrient support for the body's detox system, antioxidant system, and inflammatory/anti-inflammatory system, all of which are closely connected with cancer development and cancer prevention. There are numerous studies linking diets high in cauliflower to cancer prevention, particularly breast, bladder, colon, prostate, and ovarian cancers. In addition, cauliflower contains a wide array of antioxidants, which also helps to lower cancer risk.
     In this video, I demonstrate what is perhaps my favorite way to eat cauliflower. There is no butter, just a smooth and buttery consistency provided by the mix of mustards. Pop the florets into your mouth and enjoy it as fun appetizer, or serve it as a delicious side dish. Either way, it won't last long!
Ingredients:
1 (2 pound) head of cauliflower, cut into 1-inch florets

2 garlic cloves, chopped
1 teaspoon dried rosemary
1 teaspoon dried thyme
1 tablespoon dry white wine
2 tablespoons Dijon mustard
2 tablespoons whole-grain mustard
2 tablespoons water

Instructions:
1. Preheat the oven to 400 degrees F. Line a baking sheet with tinfoil. Set aside.
2. In a large bowl, mix sauce ingredients and stir until smooth. Add cauliflower and toss to coat.
3. Spoon the cauliflower evenly on the baking sheet.
4. Roast for 15-20 minutes until browned slightly. Transfer to a plate and serve.

Pumpkin Pie with Rustic Pecan Crust

     I am usually a pecan pie person but Robert and his brother Clint (yes, we had a guest this year!) said they preferred pumpkin so I decided to make that. Well, I am SO glad I did because this pie was, hands down, the biggest hit of our 2012 Thanksgiving. The pumpkin filling had lots of great spices, including cloves, which gave it an extra kick (as well as a slightly darker color than your typical pumpkin pie). Robert describes the pie as "exciting" (high praise indeed, as this man does not easily excite) and says he preferred its flavor to any other pumpkin pie he's ever had (that's basically the equivalent of a standing ovation). 
     My favorite aspect was the crunchy, gluten-free pecan crust. I know I bought all its ingredients from the co-op across the street but it really felt like they were gathered from the forest near my imaginary log cabin. Earthy, crunchy, woodsy, rustic... this crust was was all of the above. We enjoyed it for dessert and breakfast, and it will definitely be on the menu next year. 
     P.S. I recommend making it the day before, which actually makes things easier because it's one less thing to do on the big day. 

Ingredients:
Crust:
1 cup rolled oats, processed into a fine flour (or 1 cup oat flour)
2 cups raw pecans
3 tbsp ground flax
1 tsp ground cinnamon
1/2 tsp kosher salt
1/4 cup brown rice syrup
2 tbsp canola oil
Filling:
2 1/4 cups canned pureed pumpkin (not pumpkin pie filling)
1/2 cup brown sugar
1/4 cup almond milk
1/4 cup pure maple syrup
3 tbsp arrowroot starch (or cornstarch)
2 tsp vanilla extract
2 tsp cinnamon
1/2 tsp ground ginger
1/2 tsp nutmeg
1/2 tsp ground cloves

Instructions:
1. Preheat the oven to 350 degrees. Lightly oil a 9-inch pie pan.
2. In a food processor, process pecans until they begin to clump and oils start to release, approximately 30 seconds. You want them to stay chunky, not turn into butter. Transfer to a large bowl.
3. Mix canola oil and brown rice syrup together . Pour into bowl with pecans dough. Add the rest of the crust ingredients and mix together. Using your hands, squeeze the dough over and over to combine very well. If too dry, add more canola oil.
4. Press pecan dough firmly into pie dish to form a crust. Pre-bake at 350 degrees for 10 minutes. Remove and cool for 10 minutes.
5. In a large bowl, whisk together the maple syrup and arrowroot powder or cornstarch.
6. Add remaining ingredients and whisk together, adjusting spices to taste.
7. Pour the filing onto crust. Cover with tin foil and bake for 50-55 minutes at 350 degrees. Place on a cooling rack for 1 hour.
8. Transfer to fridge to set for a minimum of 3 hours or overnight (this is a must!). Do not slice until it's been in the fridge for at least 3 hours. Slice with a very sharp knife and enjoy every bite!

Eggplant Rollatini

     I don't like to do taste tests while I'm cooking when I follow a recipe for the first time. I prefer to wait till the dish is complete to assess and then make notes in my cookbook if necessary. The first time I was cooking this dish, though, I took a little spoonful of the filling just before I put it in the oven and was totally impressed. (To think I had only picked this dish out because I like eggplant!) The tahini makes the filling so deliciously rich and creamy. The finished result is even better with a sauce that has just the right amount of sweetness and tang. The ingredients are so clean and simple but they come together in a way that truly surprised me. The only note I made for this was to double it for next time!

Ingredients:
Filling:
2 eggplants
3 cups cooked lentils
1 tbsp miso paste
3 tbsp tahini
2 tbsp fresh minced oregano
2 tbsp fresh minced basil
2 tbsp fresh squeezed lemon juice
2 cloves garlic, minced
Sauce:
1 cup sundried tomatoes, soaked in warm water for 20 minutes
1 can diced tomatoes
1 small can tomato paste
1/4 tsp salt
2 garlic cloves
2 tbsp chopped fresh basil
1 date
2 tbsp shallot, minced

Instructions:
1. Cut off the ends of the eggplants. With flat end down on the cutting board, slice into 1/4-inch strips.
2. Heat oven to 350 degrees. Lay the eggplant strips flat on a parchment paper-lined baking sheet. Bake for 15 minutes and then set aside until cool enough to handle.
3. Meanwhile, in a medium bowl, mix together all the remaining filling ingredients. Set aside.
4. Blend all the sauce ingredients together in a blender until fully combined.
5. Spread 1 cup of the sauce on a baking dish. On a separate work surface lay each eggplant strip flat and spread 1 heaping tablespoon of filling (though if you like your rollatini thick there's no need to hold back!). Roll up into a cylinder and and place atop of the bed of sauce.
6. Pour the remaining sauce on top and cover with aluminum foil. Bake for 30 minutes, until heated through and the sauce is bubbly.

Source: Thrive Foods by Brendan Brazier

July 4th Vegan Breakfast-for-Dinner!

     Robert's brother, Clint, came to visit us at our new place in Boston over July 4th and had the excellent idea to celebrate the holiday with breakfast for dinner. I loved this idea because it allowed us to serve up lots of American classics with our own stamp of independence (read: everything was vegan). Another huge plus was that all our banging around in the kitchen and chatter drowned out most of the fireworks so Gubie had his very first non-suicidal July 4th. A revolutionary evening indeed!

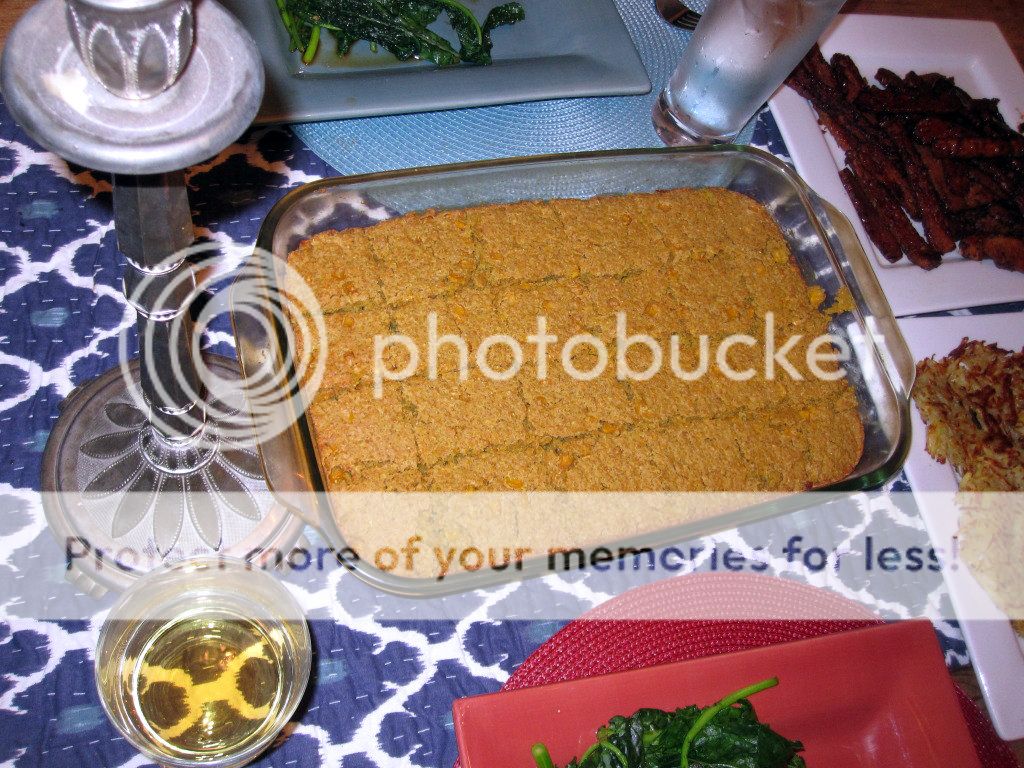
QUINOA CORN BREAD
Ingredients:
1 cup quinoa
2 cups water
1 cup fresh corn kernels
1 1/4 cups cornmeal
1/3 cup spelt flour
1 tablespoon oat flour
1 tablespoon brown rice flour
1 1/4 tablespoons baking powder
1 teaspoon baking soda
1 teaspoon sea salt
1 tablespoon unrefined sugar
1 cup soy milk
1/3 cup maple syrup
1/3 cup unsweetened applesauce
1 tablespoon flax eggs (a fantastic egg substitute: place 2 parts warm water and 1 part ground flax seeds in a blender and blend at high speed for about a minute or until the mixture becomes gelatinous. Will keep, covered, in the refrigerator for up to 2 weeks.)

Instructions:
1. To make the quinoa, first toast quinoa on a dry pan over high heat for 2 minutes. Add 2 cups of water and bring to a boil. Reduce heat to low, cover, and simmer for 18-20 minutes until quinoa is fluffy.
2. Preheat oven to 350 degrees and get out a 13x9x2-inch baking pan.
3. In a large mixing bowl, combine the corn, cornmeal, flours, baking powder, baking soda, salt, and sugar. In a separate bowl, mix together the soy milk, maple syrup, applesauce, and flax eggs. Add the wet ingredients to the flour mixture and stir well to combine. Stir in the cooked quinoa. Pour the mixture into the prepared pan and bake for 30-35 minutes, or until a toothpick inserted in the center comes out clean.

DINER-STYLE PANCAKES
Ingredients:
1 1/4 cups sifted unbleached white or spelt flour (for gluten-free, use oat flour)
2 1/2 teaspoons baking powder
2 tablespoons unrefined sugar
3/4 teaspoons sea salt
1 1/2 teaspoons flax eggs (see corn bread recipe for instructions) dissolved in 1 tablespoon soy milk
1 3/4 cups soy milk
1/2 teaspoon vanilla extract
3 tablespoons canola oil, plus more for cooking the pancakes
maple syrup (optional)

Instructions:
1. In a large mixing bowl, combine the flour, baking powder, sugar, and salt. In a separate bowl, combine the dissolved flax eggs, soy milk, vanilla extract, and oil. Mix ingredients from both bowls together, stirring well to combine. 
2. In a large skillet over medium heat, heat some oil. Drop large spoonfuls of batter onto the skillet, leaving room for the pancakes to expand. Cook until the bottoms are golden and bubbles are popping on the surface, about 2-3 minutes. Flip the pancakes and cook until golden. Repeat, using up all the batter.

TEMPEH BACON + HASH BROWNS + HOMEMADE KETCHUP
I used Colleen Patrick-Goudreau's tempeh bacon recipe and used the remaining marinade to saute the greens. We served our homemade ketchup with the hash browns. Here's the recipe for the hash browns:

Ingredients:
3 lbs. yukon gold potatoes, grated
3 tablespoons canola oil
Salt and pepper to taste

Instructions:
1. Heat oil in a large frying pan over medium-high heat.
2. Add the grated potatoes in loose patties or piles, no more than a half inch think. Sprinkle some salt and pepper on top. After a few minutes, check the underside for doneness. Once they are golden brown, use a large spatula to flip the patty and fry till golden brown on the other side. Repeat with all patties.


RED, WHITE, AND BLUEBERRY CHEESECAKE
For this recipe I added blueberry frosting and fresh strawberries to my raw vegan cheesecake. Here's the recipe for the frosting:

Ingredients:
1 cup raw cashew pieces, soaked overnight
1 cup water
4 tablespoons agave syrup
1 teaspoon vanilla extract
1/4 cup coconut oil, melted
1 cup blueberries

Instructions:
1. Pulse the cashews in a food processor until crumbly. Add the water, agave, and vanilla and blend until smooth. With the food processor running, stream the coconut oil in through the top until combined. Add blueberries and puree till smooth.
2. Spread on top of the cheesecake with a spatula before putting in the freezer as instructed.

Oat Coconut Cupcakes + Coconut Frosting

     Growing up, Robert always had coconut cake on his birthday. Last week was his birthday (and mine!) so I decided to make something similar but with my own special twists. Instead of a cake I made mini cupcakes because they are just so cute and I don't think I've ever made cupcakes before. I also made them wheat-free by using oat flour instead of the typical white flour. And, as always, they are vegan, so no animals were harmed in the making of these adorable coconutty indulgences. While sleeping in a sugar coma, I woke Robert up to ask him his thoughts on the cupcakes (this is my little trick to get him to tell me what he really thinks about things). He said, "Oh wow, they were really different." Um, excuse me? What does that mean? "They were like no cupcakes I've ever had but they were perfect." Considering that he practically inhaled these cupcakes and has already requested them for his birthday next year, I'll take that as a compliment.

Ingredients:
Cupcakes:
1 3/4 cup oat flour (you can make this yourself by whizzing up oats in the blender)
1 cup sugar
1 teaspoon baking powder
1 teaspoon baking soda
1 1/2 cup toasted coconut
1/2 teaspoon salt
1 cup coconut milk (from a can or a carton is fine)
1/2 cup canola oil
2 teaspoons vanilla extract
1 tablespoon apple cider vinegar

Coconut frosting:
1/4 cup vegan shortening (such as Earth Balance)
1/4 cup vegan margarine (such as Earth Balance)
4-5 tablespoons coconut milk
3 cups powdered sugar
1 teaspoon vanilla extract
1 teaspoon almond extract
3/4 cup toasted coconut

Instructions:
1. Preheat oven to 350 degrees.
2. Mix flour, sugar, baking powder, baking soda, toasted coconut, and salt in a medium bowl and set aside.
3. Blend coconut milk, oil, vanilla extract, and vinegar in a separate bowl. Then mix the ingredients in both bowls, whisking till just combined.
4. Fill cupcake liners 2/3 full. Bake for 15-18 minutes or until you can stick a toothpick inside the center of a cupcake and have it come out clean.
5. For the frosting, blend the margarine and shortening together till smooth. Add the powdered sugar, a little bit at a time, and then the coconut milk. Then add in the flavorings and the toasted coconut. Mix well, decorate, and enjoy!

Dark Chocolate Coconut Cookies! Rawr!

     We love our oatmeal chocolate chip cookies but we wanted to mix it up a bit and have something that would make for a healthier pre-workout snack. Well, oh my lord, these are incredible! Wow! They taste just like moist brownies. But, believe it or not, they have very little added sugar and require no baking, and include the health-promoting ingredient maca, which means we can better justify indulging in several cookies on a daily basis.

Ingredients:
Makes about 18 cookies.
(Some of these ingredients may require a visit to a health food store or the "green" section of your supermarket. Or you can use the links I've provided and order the ingredients online. Trust me, these are so good, it's worth it!)
1/2 cup shredded coconut
2/3 cup coconut flour
4 tbsp cocoa powder
4 tsp maca powder
3 tbsp agave nectar
4 tbsp almond butter
1 tsp vanilla extract
12 large Medjool dates, pits removed
3/4 cup dark chocolate chips

Instructions:
1. Heat a small frying pan over low heat and add the coconut. Toast coconut until it has turned an amber color, about 1-2 minutes, stirring constantly. Remove from heat.
2. Place the toasted coconut, coconut flour, cocoa powder, maca, and agave into a food processor and start the machine.
3. Add the almond butter and vanilla extract, then one at a time, add the pitted dates and process until a crumbly dough has formed. The dough should be, well, doughy. Like a thick cookie dough. If too wet, add additional coconut flour. If too dry, add water, a little at a time, until optimal doughiness is achieved.
4. Transfer to a bowl and mix in the dark chocolate chips. Using clean hands, grab about a table spoon and squeeze and roll to form a tight ball. Flatten the ball using your palm to form a small cookie. You're welcome!

Thanksgiving!


Menu
Shredded Brussels Sprouts with Toasted Pecans and Dried Cranberries
Garlic-Herb Mashed Potatoes and Cauliflower
Wild Mushroom Gravy
Quinoa Corn Bread
Tamarind BBQ Tempeh and Sweet Potatoes
Pumpkin-Pecan Praline Cheesecake


Raw Vegan Cheesecake

     This recipe was inspired by a recipe from my friend Yifan. It's AMAZING! When Mr. Goldhouse took the first bite be said, "Wow. This is really something special." Unlike a typical New York Cheesecake, which is loaded with unmentionables unfit for this nice blog, the ingredients in this version are so pure and simple-- a crust of ground walnuts and dates, and a filling of pureed cashews and coconut oil. Seriously, seriously good.

Ingredients:
Crust:
2 cups raw walnuts
1/2 cup dates, pitted
1/4 cup dried coconut
Filling:
3 cups raw cashews, soaked overnight
1/3 cup lemon juice
1/2 cup water
1/2 cup agave syrup
3/4 cup coconut oil, melted
1 teaspoon vanilla extract

Instructions:
1. To make the crust, process the nuts and the dates in the food processor. Sprinkle half of the dried coconut onto the bottom of a pan. Press the nut and date mix onto the coconut, lining in the pan. Sprinkle the remaining half of the coconut on top of the crust.
2. To make the filling, thoroughly process the cashews, lemon juice, agave, vanilla and water. Slowly add in the warmed coconut oil. To make it extra smooth and creamy, use a blender.
3. Pour the mixture onto the crust. Smooth with a spatula so the cake looks level.
4. Place in the freezer until firm (at least 4 hours, usually). Defrost in refrigerator and enjoy a slice of heaven!

Tempeh with Cherry Balsamic Reduction Sauce

     This week I have been experimenting with some fancy vegan dishes to serve at my parents' Passover seder. This dish definitely fits the bill. The colors and flavors are so rich and romantic. And it's so easy to prepare that it shouldn't be limited to special occasions.

Ingredients:
1 package tempeh, cut into 1/2-inch strips
3-4 tablespoons olive oil, divided
2 tablespoons water
3 tablespoons granulated sugar
1 cup fresh halved cherries or 1/2 cup dried cherries
3 tablespoons balsamic vinegar
1 yellow onion
4 cloves garlic
1 cup dry red wine
1/2 cup vegetable stock
1/2 cup nondairy milk (such as almond, soy, rice, hazelnut, hemp, or oat)

Instructions:
1. Steam the tempeh for 10 minutes in a steamer basket placed in a pot filled with a small amount of water.
2. Heat a large skillet with 2 tablespoons of the olive oil over medium-high heat and sear the tempeh until it's crispy on one side, about 5 minutes. Turn and do the same on the second side. Each side should be golden brown.
3. Remove the tempeh fro the skillet and set aside on a plate lined with paper towels (to absorb some of the oil).
4. In a small saucepan, combine the water and sugar and gently stir over medium-high heat until the sugar is completely dissolved.
5. Immediately remove the pan from the heat and stir in the cherries and balsamic vinegar. (If the sugar hardens after you add the cherries and vinegar, just return the saucepan to low heat and gently stir until the sugar melts once more.) Remove the pan from the heat and set aside.
6. Meanwhile, in the skillet you used for the tempeh, heat the remaining 1-2 tablespoons olive oil, and add the onion and garlic. Saute until the onion turns translucent, about 5 minutes.
7. Add the wine, bring the mixture to a boil, and boil until reduced to around 2/3 cup.
8. Add the stock, return the mixture to a boil, and cook until reduced to 2/3 cup again.
9. Stir in the milk and the cherry mixture and cook for just 5 more minutes until it's reduced a little more and thickened up.
10. Divide the tempeh between 2 plates and top with the sauce. Enjoy!

Source: Color Me Vegan